Are you having trouble with your garage door not closing properly? Learn how to reset the garage door sensor quickly and restore full functionality to your system.
Garage door sensors play a crucial safety role by preventing the door from closing on people, pets, or objects. But your garage door might refuse to shut or behave erratically due to malfunctions. One of the simplest and most effective solutions? Resetting the sensors. If you’re asking, “How to reset garage door sensor?” you’re not alone—this is one of the most searched garage door troubleshooting topics.
Most garage door systems use infrared sensors mounted near the bottom of the tracks. The door might stop mid-cycle or reverse unexpectedly when these sensors lose alignment, become dirty, or develop wiring issues. Fortunately, knowing how to reset garage door sensor equipment can often fix the problem in just a few steps.
Learn how to identify sensor problems, properly reset your garage door sensors, and avoid unnecessary service calls with this guide. If you’re troubleshooting your system and wondering, “How do I reset a garage door sensor?”—you’ll find the answers here.

Spot the Problem Before You Reset Garage Door Sensors
Signs Your Garage Door Sensors Need a Reset
Understanding the warning signs is the first step in knowing when to reset garage door sensors. Common indicators include:
- The garage door begins to close, but then suddenly reverses. This usually happens when the sensors detect an obstruction or are misaligned.
- There are flashing LED lights on one or both sensor units. A blinking light is often an error code indicating that the sensors are malfunctioning.
- A blinking light on your garage door opener. Many openers are designed to flash their lights to alert you to sensor issues.
- One or both sensor lights are completely off: This could mean the sensors have lost power or are no longer aligned correctly.
Check for Obstructions and Alignment Issues
Before proceeding with a reset, it’s wise to rule out simpler issues that could be causing the malfunction. In many cases, a minor obstruction or a slight misalignment is the root of the problem. Follow these steps to perform a quick inspection:
- Remove any debris or items blocking the sensor’s line of sight: Even small objects like leaves, cobwebs, or tools can interfere with the sensor beam.
- Clean the sensor lenses gently: Dust, dirt, or smudges on the lenses can block the signal. Use a soft, lint-free cloth to wipe them clean.
- Check the alignment of both sensors: They should be mounted at the same height and pointing directly at each other. If they’re even slightly off, the sensors won’t work properly.
How to Reset Garage Door Sensor: Step-by-Step Instructions
Manual Reset Method
Many garage door sensors, especially older models, can be manually reset by simply cutting and restoring power to the system. Here’s how to do it:
- Turn off the power: Locate your circuit breaker panel and switch off the breaker that controls the garage door opener. Alternatively, unplug the garage door opener from the ceiling outlet.
- Wait 30 to 60 seconds: This pause allows the system to discharge and reset its internal electronics fully.
- Restore power: Plug the opener back in or flip the breaker switch to the “on” position.
- Inspect the sensor lights: Once power is restored, check the sensors. A solid green or amber light (depending on your model) typically indicates that the sensors are aligned and functioning correctly.
Resetting via the Opener Unit
Modern garage door openers often include built-in reset or calibration functions. This method involves interacting directly with the opener unit mounted on the ceiling of your garage.
- Locate the reset button: Look for a small reset or “learn” button on the opener unit, usually near the LED display or under a cover.
- Press and hold: Hold the button for approximately 10–15 seconds, or until the indicator lights flash. This signals that the system is resetting or entering calibration mode.
- Test the system: Operate the door using your remote control or wall-mounted switch. Observe the sensors to confirm whether the issue has been resolved.
Some models may require additional steps outlined in the owner’s manual, such as reprogramming remotes or resyncing wireless sensors.
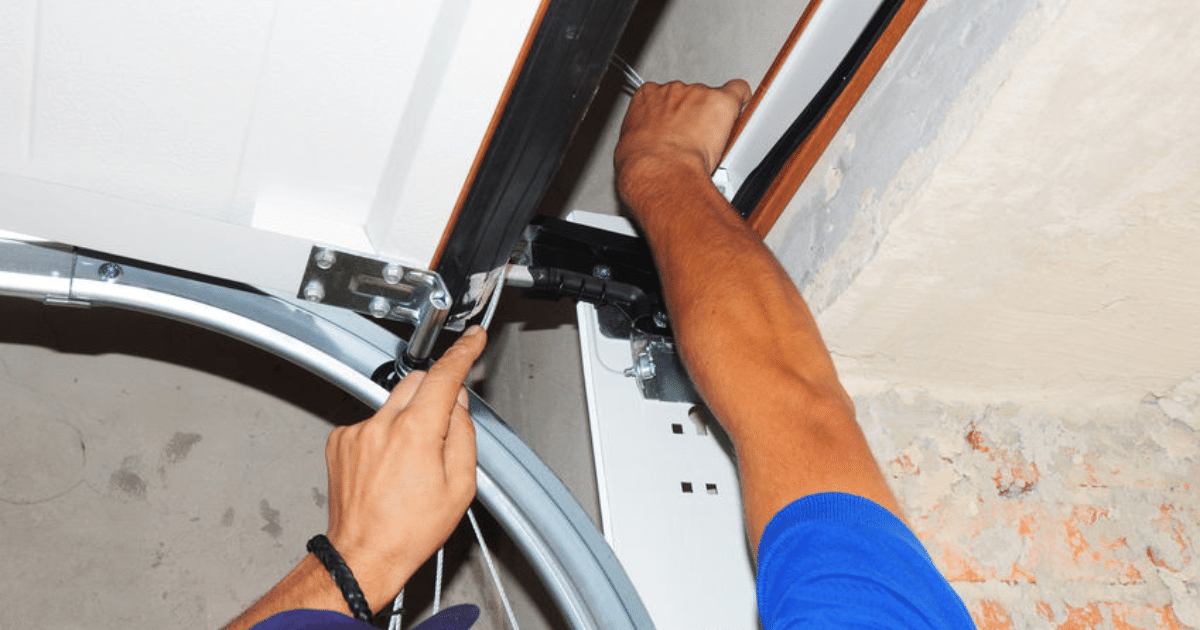
Realign and Secure Sensors
If your sensors still fail to respond after a reset, their physical alignment and stability are worth revisiting.
- Loosen the mounting brackets: Use a screwdriver to slightly loosen the wing nuts or screws holding each sensor in place.
- Realign the sensors: Gently adjust the sensors until the LED lights turn solid. This confirms that they are directly facing each other and properly aligned.
- Secure the position: Once aligned, tighten the wing nuts to hold the sensors firmly.
Even a minor bump or vibration can knock the sensors out of alignment, so this step is crucial after a reset.
How to Reset Garage Door Sensor: Troubleshooting Persistent Issues
Check Wiring Connections
Even after a successful reset, faulty wiring can prevent your sensors from operating correctly. Over time, wires can become loose, frayed, or disconnected due to vibrations, pests, or wear and tear.
- Inspect the wires leading to each sensor: Look for signs of visible damage, such as cracks in the insulation, exposed copper wiring, or frayed ends.
- Check for secure connections: Ensure the wires are firmly connected to the terminals on the back of each sensor. Gently tug each wire to see if it’s loose.
- Look for pinched or bent wires: Wires bent sharply or pinched under mounting hardware can break internally or short out.
- When to call a professional: If you find damaged wires or connections that seem beyond a simple fix, it’s best to contact a garage door technician. Attempting electrical garage door repairs without experience can be dangerous and may void your warranty.
Test the System
Once you’ve ruled out wiring issues and performed a reset, testing the entire system is essential to ensure the sensors are functioning correctly.
- Use your garage door remote or wall switch: Activate the garage door opener and observe how the door behaves.
- Watch the sensor indicator lights: Both sensor lights should remain solid when nothing is blocking the path. Blinking or dim lights may still indicate misalignment or a lingering fault.
- Monitor the door’s movement: The garage door should close smoothly and completely. However, if it reverses before closing or stops midway, the sensors may still be misaligned or malfunctioning.
- Test the obstruction feature: Try waving a small object, like a broomstick, in front of the sensors while the door is closing. If the sensors detect the obstruction, the door should automatically reverse. If not, the safety system is not functioning correctly and requires further attention.
When a Reset Isn’t Enough: Time to Call a Pro
If you’ve followed all steps on how to reset the garage door sensor and the problem continues, the issue may go deeper. Common advanced matters include:
- Internal circuitry failures in the sensors
- Miscommunication between sensors and the opener
- Faulty garage door opener logic board
At this point, it’s best to consult a qualified technician. Companies like Superior Garage Door of Riverside can quickly diagnose, repair, or replace faulty components.

Frequently Asked Questions
How do you reset a garage door sensor?
Unplug the opener or turn off the breaker for about 30 seconds, then turn the power back on. Ensure the sensors are clean and aligned—if both lights turn solid, the reset worked.
How do I fix my garage sensor red light?
A red light usually means something is blocking the sensor or it’s out of alignment. Clean the lens and adjust the sensor until the light turns solid or green.
How do I realign my garage door sensors?
Loosen the brackets and adjust the sensors so they point directly at each other at the same height. When both lights stay solid, tighten the brackets and test the door.
How do I check my garage door sensors?
Look for dust, dirt, or damage on the sensors and make sure both lights are on and steady. You can also block the sensor beam to see if the door stops or reverses correctly .
How long does it take for sensors to reset?
Most new garage door sensors reset automatically within a few seconds after fixing alignment or power. If the lights don’t turn solid after 10 seconds, try cleaning or adjusting them again.
Conclusion
Understanding how to reset garage door sensor units is a straightforward and effective way to fix common garage door issues. Most problems, from power cycling to realignment, can be resolved quickly without professional help. Regular inspection and occasional cleaning of your sensors will help prevent these issues from recurring.
If the problem persists, it may be time for expert assistance. Resetting will not fix internal faults or wiring damage. Accurate diagnosis and timely repairs can prevent serious system failures and keep your garage door functioning reliably.
When you need fast, local support for persistent garage door issues, Superior Garage Door of Riverside is just a call away. We’ll help you determine whether a simple reset will do or if further service is needed.
End Note
Superior Garage Door of Riverside understands how inconvenient garage door sensor issues can be. Whether you’re trying to reset sensors, fix alignment, or troubleshoot persistent errors, our team is ready to help. We offer comprehensive garage door repairs and specialized garage operator repairs tailored to your system’s needs.
We proudly serve Riverside County and surrounding service areas, including Beaumont, CA, and Temecula. To troubleshoot other garage door problems, browse our helpful blogs and FAQs.
To learn more about us or to get expert help quickly, visit our contact page or connect with us on Facebook. We’re committed to providing fast, reliable support when needed.
SUPERIOR GARAGE DOOR OF RIVERSIDE
Riverside, CA
+19517127652