Avoid rookie mistakes! Learn how to change a garage door motor safely while keeping your door in perfect condition with these proven tips.
The garage door motor is a vital component that ensures the smooth opening and closing of your door. Over time, it can wear out or malfunction due to regular use. If you’ve noticed that your garage door is struggling to open or close, or if it has become unusually loud, you may be facing an issue with the motor. If that’s the case, knowing how to change a garage door motor is essential for ensuring the continued functionality of your garage door.

Changing the motor of a garage door might seem like a daunting task, especially if you’re concerned about damaging the door or the opener system. However, with the proper tools and instructions, replacing your garage door motor can be done safely and efficiently. In this article, we’ll walk you through the process of changing your garage door motor, highlighting the key steps to avoid any potential damage to the door or opener.
It’s important to ensure that you’re familiar with the specific parts of your garage door system before beginning the motor replacement process. This includes understanding how the door opener works, the type of motor installed, and the specific tools you’ll need. With the right knowledge and preparation, you can replace your garage door motor with confidence and avoid common pitfalls.
Step-by-Step Guide on How to Change Garage Door Motor Safely
Replacing a garage door motor requires careful attention to detail to ensure both safety and proper functionality. Following these steps will help you complete the task confidently while protecting your equipment and yourself.
1. Disconnect the Power Supply and Prepare the Work Area
The first and most important step is disconnecting the power supply to the garage door opener. Unplug the unit from the outlet or turn off the corresponding circuit breaker at the electrical panel. This eliminates the risk of accidental activation or electrical shock.
Before beginning, clear any tools, vehicles, or storage items from around the garage door opener and tracks. A clean, open work area makes the job safer and more efficient.
Tip: If your opener has a battery backup, disconnect it as well to ensure no power is flowing to the motor.
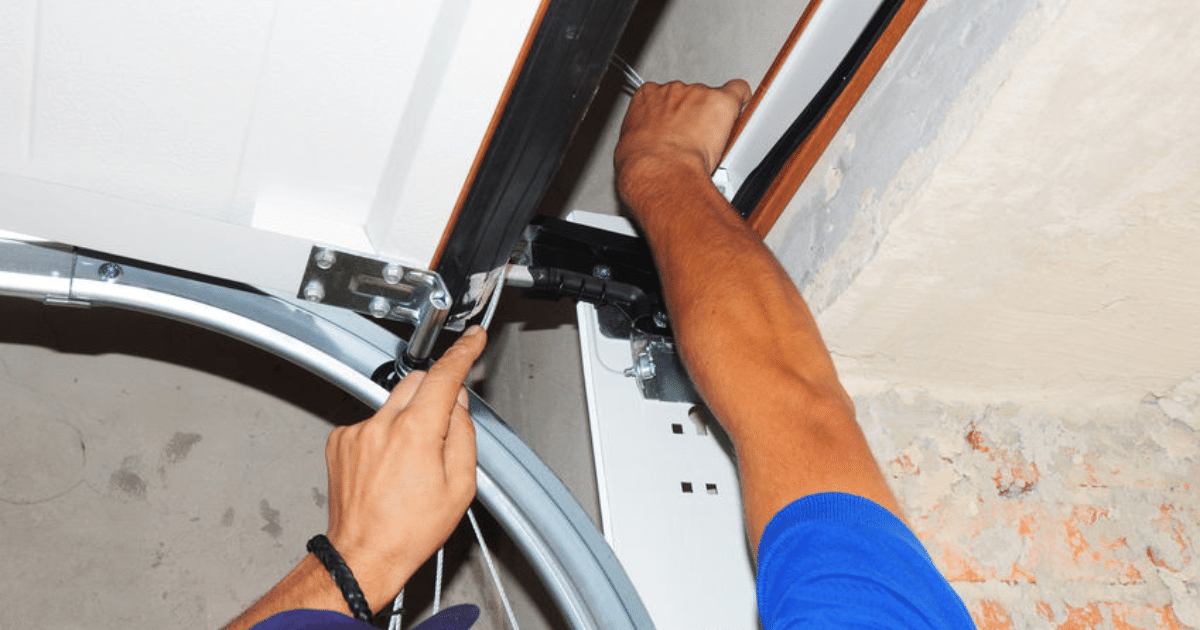
2. Remove the Old Motor
Begin by removing the cover or housing on the garage door opener to access the motor and its connections. Take photos of the existing setup or label wires and components to help you replicate the arrangement when installing the new motor.
- Detach Safety Sensors: If necessary, disconnect the photo-eye sensors and control wires from the opener.
- Disconnect Drive Mechanism: Carefully remove the chain, belt, or screw drive from the motor sprocket. Loosen any tensioners before attempting removal to avoid damaging the hardware.
- Remove Fasteners: Use the appropriate tools to detach the motor from its mounting brackets and from the door’s rail system. Be cautious, as the motor unit can be heavier than it appears.
- Lower the Motor Safely: Have a second person assist if needed to prevent injury or damage when lowering the old motor from its installed position.
3. Install the New Motor
With the old motor removed, it’s time to position and install the new one.
- Secure the Motor: Mount the new motor to the existing brackets, ensuring it aligns properly with the rail system and the door. Confirm that it is level and securely fastened before proceeding.
- Reconnect the Drive System: Reattach the chain, belt, or screw drive mechanism to the new motor’s sprocket. Adjust the tension according to the manufacturer’s guidelines—proper tension is crucial to avoid premature wear or malfunction.
- Reconnect Safety Components: Attach the control wires and safety sensors to the new motor following the manufacturer’s wiring diagram. Double-check all connections for security and accuracy.
Note: Some newer models may require pairing with remotes or resetting the travel limits for opening and closing.
4. Reassemble and Secure the Garage Door System
Once the new motor is installed and connected:
- Reattach any removed covers or protective panels on the motor unit.
- Confirm that all bolts, brackets, and hardware along the rail system are tightened securely.
- Inspect the alignment of the rail and door for smooth operation.
Ensuring everything is properly aligned prevents unnecessary strain on the motor and door.
5. Test the Door’s Operation

Reconnect the power by plugging the opener back in or flipping the circuit breaker on. Begin by testing the garage door’s operation manually with the opener’s control button:
- Open and close the door several times.
- Listen for unusual noises and observe the door’s movement. It should operate smoothly without jerking, hesitation, or grinding.
- Adjust the travel limits and force settings if necessary to ensure the door opens fully and closes tightly.
For openers with smart features or remotes, complete any setup steps required by the manufacturer, such as syncing remotes or connecting to apps.
6. Final Safety Check
- Verify that the safety sensors stop the door from closing if something crosses the sensor beam.
- Confirm that the manual release cord disengages the opener properly in case of emergencies.
- Check the backup battery function if applicable.
Common Mistakes to Avoid When Replacing a Garage Door Motor
When learning how to change ga arage door motor, there are several common mistakes that homeowners can make, which can lead to damage or malfunction. To ensure a successful motor replacement, avoid these pitfalls:
Not Disconnecting the Power
One of the most common mistakes when replacing a garage door motor is failing to disconnect the power supply. This can result in electrical accidents or damage to the opener system. Always ensure that the power is completely turned off before starting the replacement process.
Improper Alignment of the Motor
Another mistake to avoid is improperly aligning the new motor with the door system. Misalignment can cause the door to operate inefficiently or even damage the motor and opener components. Be sure to follow the manufacturer’s instructions for correct motor installation, and take extra care to check the alignment before tightening bolts.
Skipping the Test Run
After replacing the motor, it’s important to perform a test run to ensure everything is functioning properly. Skipping this step can lead to undetected issues, such as incorrect tension, misalignment, or failure to operate smoothly. Always test the door several times before considering the replacement complete.
Frequently Asked Questions
How do I know if my garage door motor needs to be replaced?
If your garage door is struggling to open or close, making excessive noise, or operating intermittently, these could be signs that the motor is failing. If troubleshooting doesn’t resolve the issue, it may be time to replace the motor.
How long does it take to replace a garage door motor?
Replacing a garage door motor typically takes between two and four hours, depending on the complexity of the system and whether the components are easy to access.
How much does it cost to replace the motor for a garage door?
Replacing a garage door motor typically costs between $300 and $600, including parts and labor. The exact price depends on the brand, type of opener, and local labor rates. Higher-end models or heavy-duty motors may cost more.
How much does a new garage door motor cost?
A new garage door motor typically costs between $150 and $350, depending on the type (chain, belt, or direct drive) and its features. Premium models with smart technology or battery backup will be on the higher end. Installation costs are separate.
What is the lifespan of a garage door motor?
Garage door motors typically last between 10 and 15 years with regular use and maintenance. Factors such as frequency of use, climate, and maintenance can impact longevity. Quality models may last even longer if properly cared for.
Conclusion
Replacing your garage door motor doesn’t have to be a stressful task. By understanding how to change a garage door motor and following the proper steps, you can ensure a smooth, safe replacement process. Be sure to take your time, avoid common mistakes, and always test the door after installation to verify that everything works correctly.
If you’re unsure about replacing your garage door motor yourself or if you’re facing any difficulties during the process, don’t hesitate to contact a professional. Superior Garage Door of Riverside offers expert garage door repair and motor replacement services, ensuring that your garage door operates smoothly and safely.
End Note
Superior Garage Door of Riverside is a trusted provider of garage door repair, installation, and maintenance services. If you’re looking to replace your garage door motor or need any other garage door services, our team is here to assist you with reliable solutions.
We offer a range of services, from garage door repairs to garage operator repairs, ensuring your garage door runs like new. Our experienced team can help with all types of garage door motors and openers, including troubleshooting, replacement, and maintenance. To schedule an appointment, visit our contact page.